The run console
Once you arm, the Eclipse imaging console opens. This is the live instrument panel you watch through the run. It stays on top and remains independent of the main HelioMaker window, so minimizing HelioMaker does not hide the console behind SharpCap or PHD2.
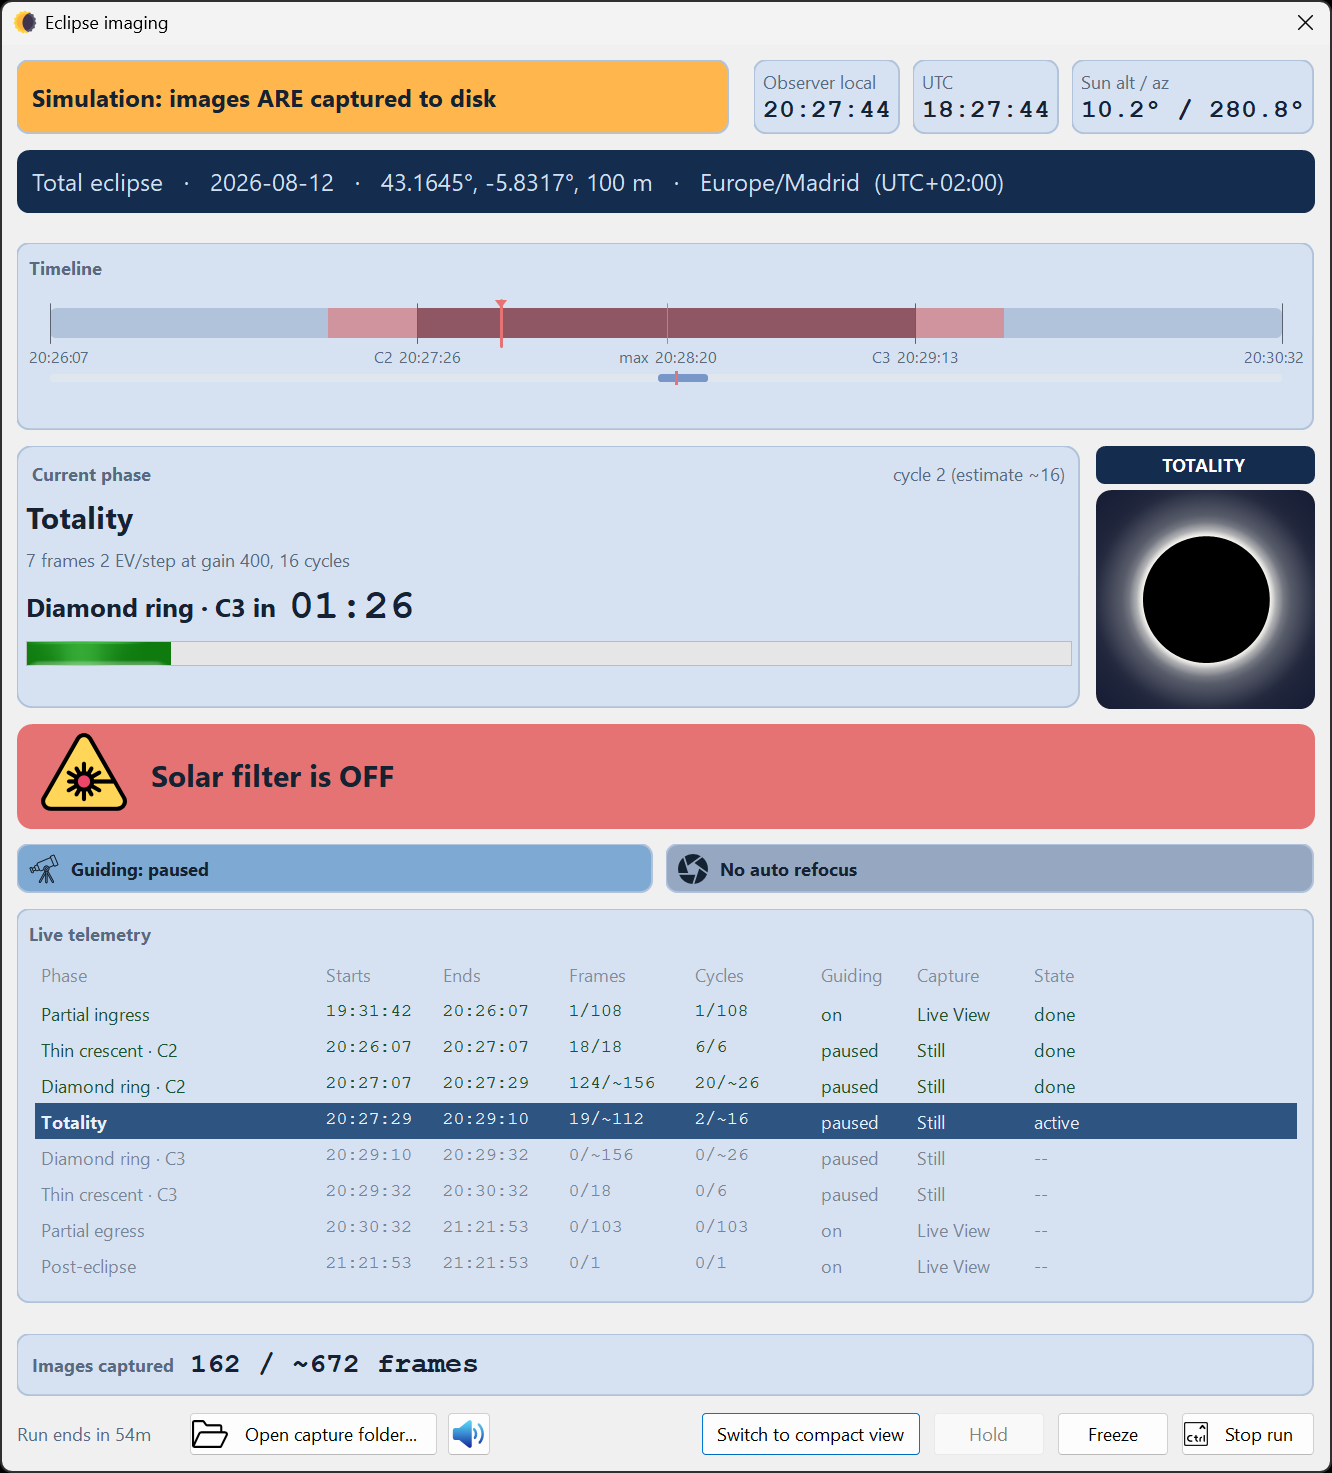
First confirm the run identity
- Run type banner
- The largest item in the top row distinguishes LIVE ECLIPSE: this is the real thing, Simulation: images ARE captured to disk, and Simulation: timing only, no images captured. Read it before relying on the run.
- Observer local, UTC and Sun alt / az
- Both clocks are always visible. The Sun altitude and azimuth are calculated for the run clock and selected observer site. The Time display choice made before the run controls the contact, phase and timeline labels; it does not remove either clock from the console.
- Event identity band
- The dark strip identifies the eclipse type, date, coordinates, elevation and IANA time zone with its UTC offset. Use it to catch a wrong event or site before the critical phases.
Timeline, phase and live geometry
- Timeline
- The main rail shows the current time, contacts, totality and the interval in which the filter is planned to be off. Near the central phases it automatically enlarges the thin crescent or diamond ring through C3 window so C2, maximum eclipse and C3 remain readable. A smaller overview rail continues to show the full C1 to C4 event and the position of the enlarged window.
- Current phase card
- Shows the active phase, its exposure or HDR recipe, camera gain, planned cycle count, completed cycle count, progress bar and a large countdown to the next phase. Between phases it states what HelioMaker is waiting for and counts down to that phase.
- Live geometry
- A calculated full solar disk view follows the run clock, including a compressed rehearsal clock. It is a stable visual model of eclipse progress, not a live camera image and not proof that the physical Sun is centred.

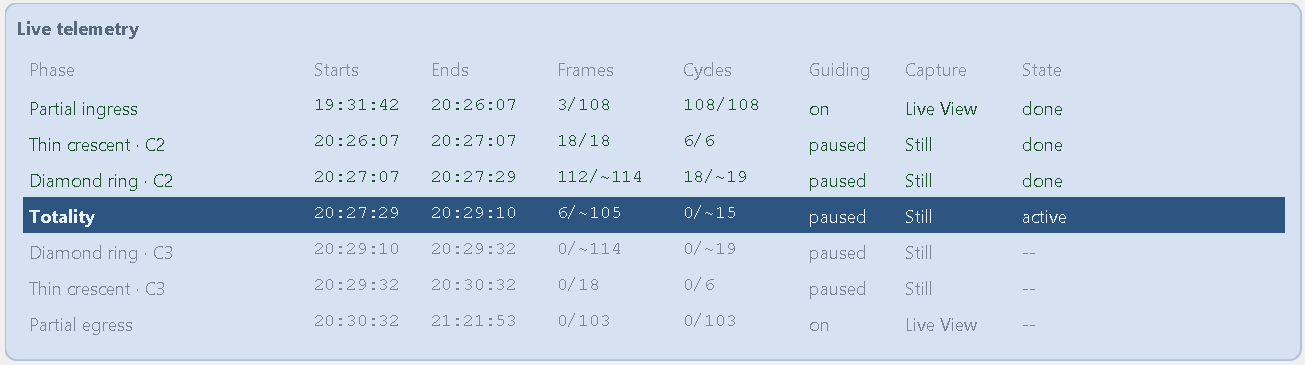
Live telemetry and capture progress
The telemetry table keeps every planned phase visible and highlights the active row. Its columns are intended to answer both what the plan requested and what the rig is doing:
| Column | Meaning |
|---|---|
| Starts / Ends | The phase boundaries in the time display selected before the run. |
| Frames / Cycles | Completed versus planned counts. A tilde marks a prediction for
a deadline governed phase, so 12/~8 means twelve were captured against an estimate of eight. |
| Guiding | The plan's state for that phase: on, off or paused. The active cell turns red if PHD2 disagrees with the plan; stalled means PHD2 has stopped reporting reliably. |
| Capture | The phase's planned SharpCap mode: Live View or Still. The active cell turns red when the camera reports the other mode. |
| State | active, done, MISSED, FAILED, or -- for a phase still to come. |
Images captured shows the total confirmed frames against the plan estimate. A separate missed count appears when frames are lost during Hold.
The footer carries buttons only. It used to lead with status text — time remaining, and
the progress of post-capture image-set saving — and on a narrow console those growing labels could push
Stop run off the end of the row. Nothing that matters was lost: the countdown to the next
phase is on the phase card where you are already looking, and image-set saving is reported in the run log and in
eclipse_run.log.
In full view, Open capture folder... opens the current run folder. Captured files and
eclipse_run.log are stored there, providing the durable record behind the live panel.
Shutter sound feedback
Shutter feedback is enabled by default and follows SharpCap capture telemetry, not merely an HM dispatch request. Short clicks and bursts follow confirmed forward progress. The long-exposure open/close pair is different: it marks SharpCap starting and ending an exposure attempt, and does not prove that the image was accepted or saved. Use the live frame counts, final summary and capture folder as the record of successful images. The sound is adapted to the phase:
- Pre-eclipse, partial and post-eclipse single shots use one short shutter click.
- Each completed HDR bracket in a thin crescent or the central phase uses a short group of clicks matching the bracket size, up to nine. The central phase used to be silent; it is not any more, for every eclipse type.
- The rapid short exposures in the C2 and C3 diamond ring phases use an occasional restrained burst rather than one click for every high-speed frame.
- Exposures of one second or longer use distinct shutter-open and shutter-close sounds, in the diamond ring phases and in totality. These are camera-activity cues, not saved-file confirmations.
The diamond ring phases never take the completed-bracket click group. That is deliberate: they last seconds and fall exactly where your hands are on the filter, which is not a moment to add a burst of clicks to. They are not silent, though — their short exposures still produce the restrained burst above, and their long ones still produce the open and close sounds.
Simulated runs make these sounds too. A rehearsal on the built-in eclipse simulator used to be completely silent, which made it a poor rehearsal of what eclipse day sounds like; the clicks now follow the simulator's own file writing, at the plan's real cadence.
The small shutter button beside Open capture folder... is available in both full and compact views. Its tooltip states the current setting: Silent shutter OFF means capture sounds are audible; Silent shutter ON mutes them. This control affects shutter feedback only, not the spoken safety and filter cues, which use their own audio track.
The filter cues: visual confirmation for removal
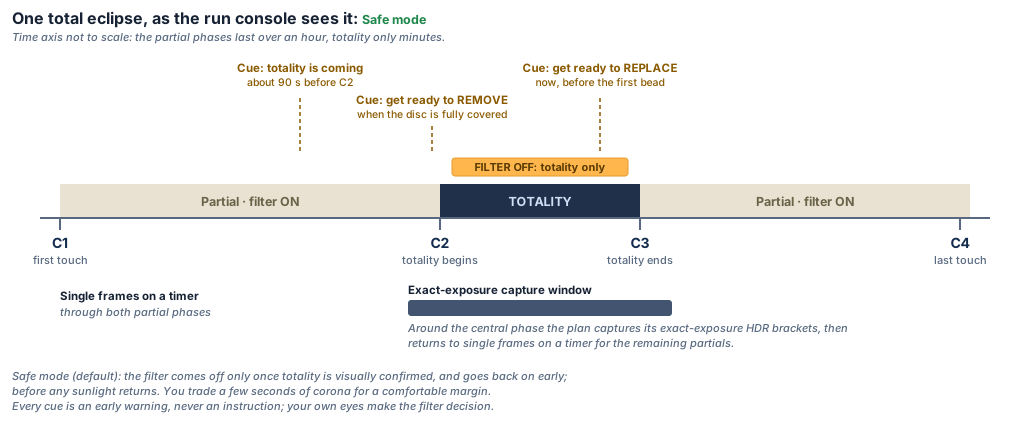
The most important thing the console does is tell you when to move the filter. The cues are both visual (a large banner) and audio (spoken prompts, if enabled). Filter removal requires the visual confirmation defined by the selected mode. Safe mode replacement is deliberately scheduled early, while the disc is still covered. The countdown is advisory and is displayed separately in large type.
Guiding, refocus and recovery
| Status | Console meaning |
|---|---|
| Guiding | Green means locked with stable Sun detection and normal drift; blue means an intentional planned pause; amber identifies questionable calibration; red identifies lost or unstable Sun detection, drift above 20 guide-camera pixels, stopped guiding when required, a lost PHD2 link, or a mount that is slewing, parked or not tracking. A mount that is not tracking outranks whatever the plan asked for, so the badge states the mount fact plainly, for example Mount parked, waiting for unpark: guiding cannot run at all until the mount tracks again. A neutral badge means guiding is not required now. When recovery needs a new PHD2 session, the badge offers Reconnect PHD2 in both full and compact views. If the PHD2 camera or mount is disconnected, HelioMaker reconnects the equipment before sending any looping, target-selection or guiding command. Eclipse imaging continues while this guiding path is being repaired. |
| Automatic refocus | Blue means armed, waiting, or pausing guiding; the near-white badge marks an active focus scan; green means complete; red means failed, unable to run because focus was not confirmed, or that the refocus time window was missed. A neutral badge means refocus is off or is not scheduled for this run. See Focusing. |
| SharpCap camera and connection | If camera frames stop, the device disconnects, the wrong camera opens, or the SharpCap capture link is lost, capture is held and its recovery state takes priority over ordinary refocus status. The console reports the outage, waiting, relaunching, reconnecting and settings-restoration stages. HelioMaker resumes only after the planned camera is open and its capture folder, mode and image settings have been restored. A brief USB outage may recover inside SharpCap's own grace period; a longer outage can repeat the critical alarm while operator attention is still required. |
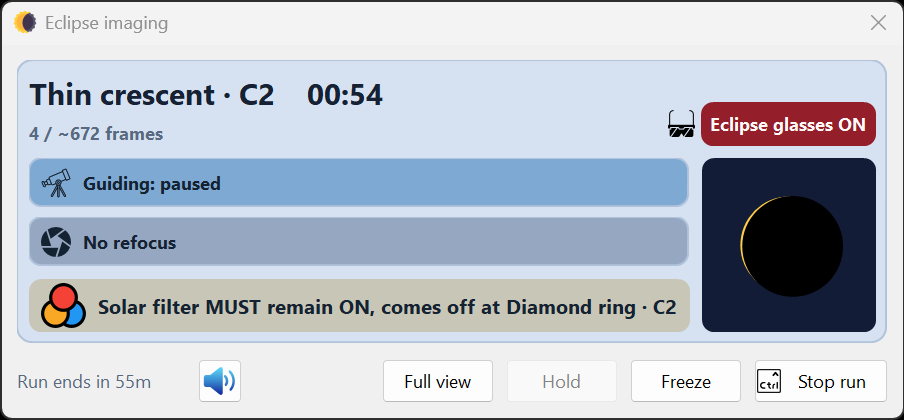
Compact console view
Select Switch to compact view to reduce the always on top console to a narrow corner strip. Select Full view to restore the complete panel.
The compact strip retains the calculated geometry, phase and countdown, captured and missed frame counts, guiding and refocus badges, and the complete filter cue with its countdown. Filter instructions are never abbreviated. The footer remains available for Full view, Freeze during rehearsals, and Stop run. The capture-folder and Silent shutter controls remain available; the detailed timeline and telemetry are hidden until Full view is restored.
Beside the calculated geometry, both console sizes show Eclipse glasses ON outside totality. During the fully covered interval it changes to a distinct TOTALITY indicator. Treat it as a prominent reminder, not a substitute for observing the real Sun and following certified eye-safety practice.
Guiding and refocus each occupy a full-width bar carrying its own icon, in both the compact strip and the full console, so the two rig questions read the same way at either size. Both bars are always present: when refocus is not scheduled the bar says so rather than disappearing.
Hold, Freeze and Stop
- Hold
- Manual Hold is intentionally disabled in this beta release. Do not plan on pausing a live eclipse run: use Stop run only when capturing must end completely. HelioMaker may still place the session on hold automatically if the mount starts slewing or stops tracking; the red console banner states what happened and the session resumes automatically when the mount is tracking again.
- Freeze / Unfreeze
- A rehearsal only control that stops the rehearsal clock and schedule so you can inspect the panel. Unfreeze continues from the same simulated eclipse instant. Freeze is hidden during the live eclipse and is unavailable while the run is held.
- Stop run
- Hold Ctrl and click to end capturing. This cannot be undone. Closing an active console with its window close button instead opens a guarded confirmation requiring Yes, stop imaging the eclipse; Enter or Escape cannot confirm the stop.
When the run ends
The console returns to full view automatically. The current phase card becomes Run summary, reports Event ended, and shows the total frames captured, planned and missed. The phase telemetry remains as the final per phase record.
If frame timing data is available, a Timing summary button opens the detailed report in
a browser. The summary card itself deliberately carries only the one result you came back for — frames
captured against frames planned. The timing verdict is written to the run log and to
eclipse_run.log, and the report behind that button holds the detail; a second, smaller line under
the headline only competed with it. Hold, Freeze and compact controls disappear, and
Stop run becomes Done with no Ctrl key required.